05_GET
Code-Dateien
| Dateiname | Aktion |
|---|---|
| CODECode_Bank.zip | Download |
| CODECode_Pizza.zip | Download |
| CODECode_student.zip | Download |
Videos
| Dateiname | Aktion |
|---|---|
| VIDEOVideo_Bank_D | Abspielen |
| VIDEOVideo_Pizza_E | Abspielen |
Lernmaterialien
Client Server

Client–server architecture is a network design model where computing tasks are divided between two main types of computers (or processes):
Clients – the requesters of services or resources.
Servers – the providers of those services or resources.
Basic Concept
In this architecture:
The client sends a request for data or services.
The server processes the request and sends back a response.
This structure allows multiple clients to access shared resources provided by a central server.
A web application:
Client: Your web browser (Firefox).
Server: A web server (Apache) that hosts the website.
When you open a webpage:
The browser (client) sends an HTTP request to the server.
The server processes it (maybe queries a database).
The server returns the webpage (response) to the browser.
URL
URL stands for Uniform Resource
Locator.
It’s the address you type into a browser (or that an
app uses) to access a resource on the internet or a network.
Think of it as the “home address” of something online — like a webpage, image, or API endpoint.
https://www.griesmayer.com:8080/api/students?id=10#profile
| Part | Example | Meaning |
|---|---|---|
| 1. Scheme / Protocol | https:// |
Defines how the client and server communicate.
Common examples: - http → regular web traffic -
https → secure web traffic (encrypted) - ftp,
mailto, etc. |
| 2. Host / Domain | www.griesmayer.com |
The server’s name (or IP address) where the resource is hosted. |
| 3. Port (optional) | :8080 |
Specifies which port number the server listens on.
Default ports: 80 for HTTP, 443 for
HTTPS. |
| 4. Path | /api/students |
Shows the specific resource or location on the
server. In REST APIs, this often identifies what kind of resource you
want (like /students, /courses, etc.). |
| 5. Query String (optional) | ?id=10 |
Extra parameters sent to the server — key-value
pairs that provide details or filters. Example: ?id=10
means “get the student with ID 10.” |
| 6. Fragment / Anchor (optional) | #profile |
Refers to a specific part within a page (used mostly in web pages, not APIs). Example: jumps to the “profile” section of the page. |
REST Request

REST is based on the idea of resources — everything (like a student, user, product, order, etc.) is treated as a resource that can be accessed or manipulated using standard HTTP methods.
Each resource is identified by a URL (Uniform Resource Locator).
https://api.griesmayer.com/students/10This could represent the student with
ID = 10.
A typical REST request includes:
| Part | Description | Example |
|---|---|---|
| HTTP Method | Defines the action to perform | GET, POST, PUT, DELETE |
| URL (Endpoint) | Identifies the resource | /api/users/10 |
| Headers | Provide metadata (like format or authentication) | Content-Type: application/json |
| Body (optional) | Data sent to the server (usually in POST or PUT) |
Common HTTP Methods Used in REST:
| Method | Purpose | Example |
|---|---|---|
| GET | Retrieve data | GET /students → get list of students |
| POST | Create a new resource | POST /students → add a new student |
| PUT | Update an existing resource | PUT /studnets/10 → update student with the
ID 10 |
| DELETE | Remove a resource | DELETE /students/10 → delete student with the
ID 10 |
REST request
POST /api/students HTTP/1.1
Host: griesmayer.com
Content-Type: application/json

{
  "name": "Thomas",
  "course": "Informatics"
}| Line | Meaning |
|---|---|
| POST | The HTTP method → this means the client wants to create a new resource (in REST, usually a new record). |
| /api/students | The endpoint (path on the server) → this identifies the collection of student records managed by the system. |
| HTTP/1.1 | The HTTP protocol version used for the request. Most web APIs still use this. |
| Host: griesmayer.com | The server’s domain name — the request is being
sent to griesmayer.com. It tells the browser or client
where to send the request. |
| Content-Type: application/json | This tells the server that the data in the request body is formatted as JSON (JavaScript Object Notation). The server will parse it accordingly. |
| Body (the JSON data) | This is the payload — the actual data you’re
sending to the server. Here it defines a new student:
{ "name": "Thomas", "course": "Informatics" } |
REST response
HTTP/1.1 201 Created
Content-Type: application/json

{
  "id": 15,
  "name": "Thomas",
  "course": "Informatics"
}| Line | Meaning |
|---|---|
| HTTP/1.1 | The protocol version — the same HTTP version used in the request. |
| 201 Created | The status code and status message. 🟢 201 means: “The resource was successfully created.” It’s used when a POST request adds something new to the server (like a new student). |
| Content-Type: application/json | The server is saying: “I’m sending the response data in JSON format.” The client should parse it as JSON. |
| Body (the JSON part) | The actual data the server returns — usually the new resource that was created, including its new ID assigned by the system. |
Node Hello World
🧩 Step 1: Create the Project Folder
Open your terminal (or Command Prompt), and type:
mkdir student
cd student
This creates and opens the folder student.
🧩 Step 2: Initialize a Node.js Project
Run this inside the folder:
npm init -yThis creates a file called
package.json, which stores information
about your Node.js project.
🧩 Step 3: Create the Application File
Create a file named server.js inside
the student folder:
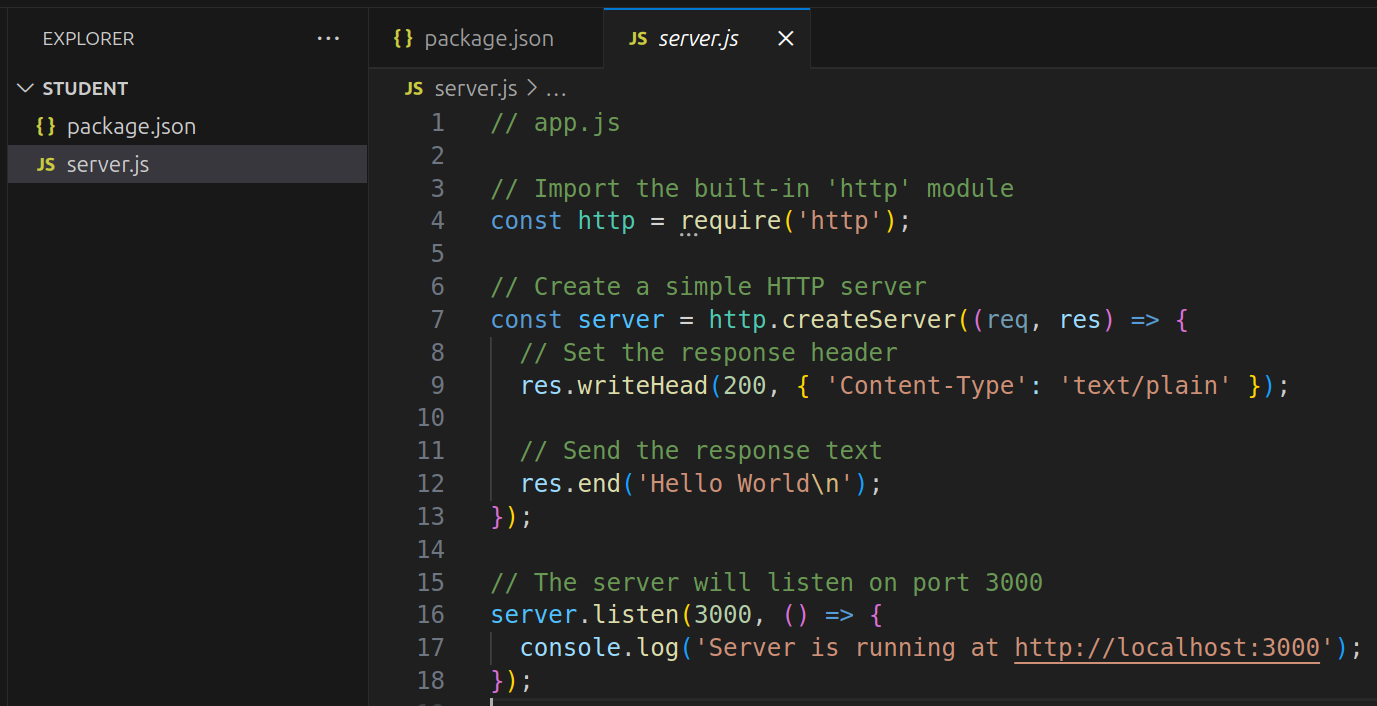
// server.js

// Import the built-in 'http' module
const http = require('http');

// Create a simple HTTP server
const server = http.createServer((req, res) => {
  // Set the response header
  res.writeHead(200, { 'Content-Type': 'text/plain' });
   // Send the response text
  res.end('Hello World\n');
});

// The server will listen on port 3000
server.listen(3000, () => {
  console.log('Server is running at http://localhost:3000');
});
const http = require('http');Load the built-in HTTP module and store it in a
constant named http so I can use it in my program.
| Part | Meaning |
|---|---|
require('http') |
This is a function call that loads a
module. In Node.js, modules are reusable pieces of
code. 'http' is the name of a built-in
module that allows you to create web servers and handle HTTP
requests and responses. |
const http |
This defines a constant variable named
http that stores whatever the require()
function returns — in this case, the HTTP module
object. |
const server = http.createServer((req, res) => {
  // code to handle requests goes here
});| Part | Meaning |
|---|---|
const server = |
Creates a constant variable named
server to store the server object that
we’re about to create. |
http.createServer(...) |
Calls the createServer() function from
Node’s http module. This function creates
a new HTTP server. |
(req, res) => { ... } |
This is an arrow function — it’s the request handler. It defines what the server should do every time a client (like a browser) sends a request. |
Inside createServer, the function
(req, res) receives two objects:
| Parameter | Full name | Purpose |
|---|---|---|
req |
Request object | Contains details about the client’s request (URL, method, headers, etc.). |
res |
Response object | Used to send a reply back to the client (status code, headers, and content). |
res.writeHead(200, { 'Content-Type': 'text/plain' });| Part | Meaning |
|---|---|
res |
The response object — used to send data and metadata back to the client. |
writeHead(statusCode, headers) |
A method that writes the status code and headers to the HTTP response. |
200 |
The HTTP status code. 200 means
OK → the request was successful. |
{ 'Content-Type': 'text/plain' } |
These are the headers — they tell the client what
type of data to expect. 'text/plain' means the server will
send plain text, not HTML or JSON. |
res.write('Hello Thomas\n');
res.write('Hello Andrea\n');
res.write('Hello Verena\n');
res.write('Hello Marion\n');
res.end('Hello World\n');
This line sends the actual content (the body of the response) to the client and ends the response.
| Part | Meaning |
|---|---|
res.end() |
Signals that the response is finished — no more data will be sent. |
'Hello World\n' |
The content (body) that will appear in the browser.
The \n adds a new line character. |
🧩 Step 4: Run the Application
In your terminal, run:
node server.jsYou’ll see:
Server is running at http://localhost:3000🧩 Step 5: Test It
Open your browser and go to:
You should see:
Hello World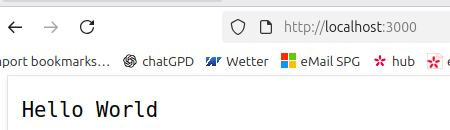
$ curl http://localhost:3000
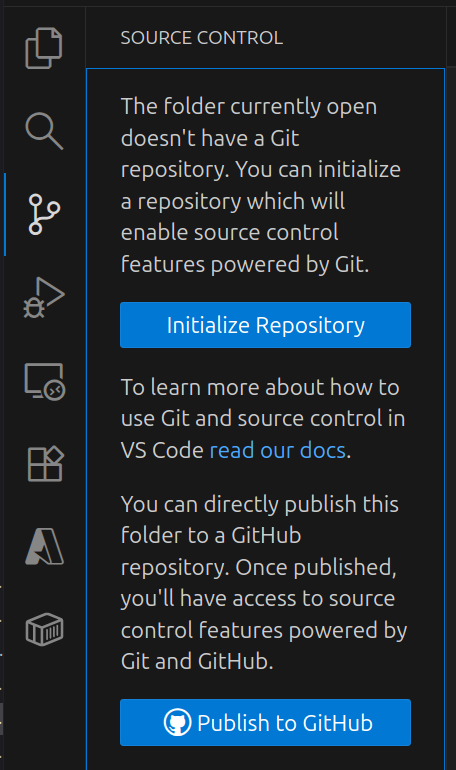
Hello World🧩 Step 5: GIT

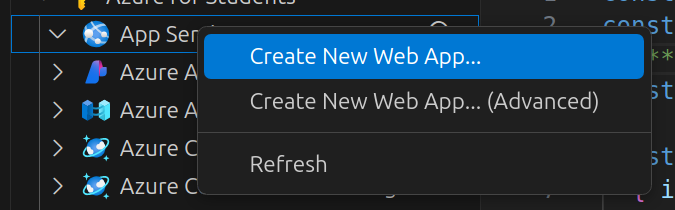
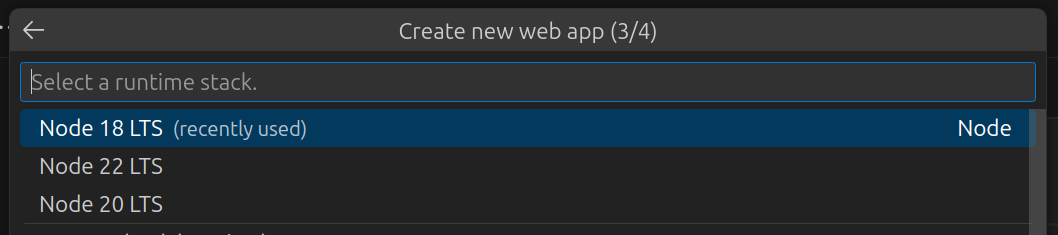
🧩 Step 6: Azure
!!! FEHLT !!!
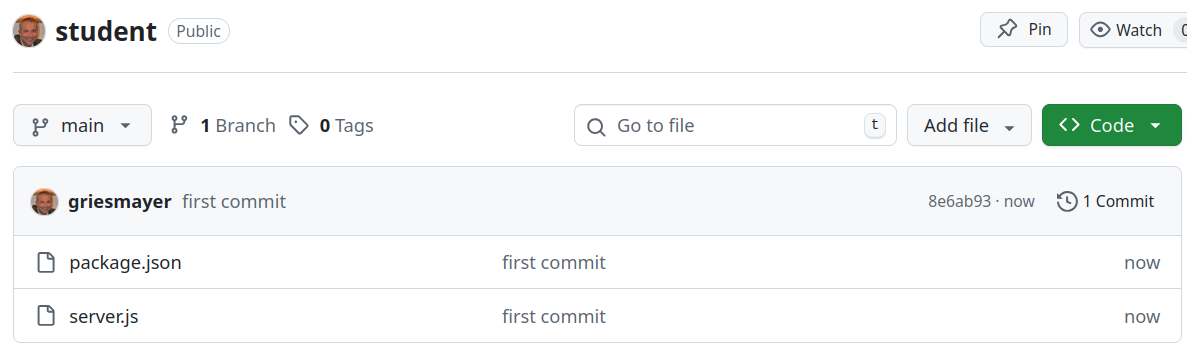
✅ Folder Structure
student/
│
├── server.js
└── package.json
Express
Express (or Express.js) is a web application framework for Node.js.
Express is a toolkit that makes it much easier and faster to build web servers and APIs with Node.js.
| Feature | What It Does |
|---|---|
| Routing | Easily define endpoints (like /,
/students, /login) |
| Middleware | Add reusable functions for things like logging, authentication, or data parsing |
| Request & Response Handling | Simplifies reading input and sending responses |
| Static File Serving | Serve HTML, CSS, JS, and image files easily |
| Integration | Works perfectly with databases (MongoDB, MySQL, PostgreSQL, etc.) |
1. Make sure you’re in the project folder
cd student2. Install Express
npm install expressThis adds Express to your dependencies in package.json
and stores it in the node_modules/ folder.

3. Edit
server.js
Replace the contents of your server.js with the
following code:
// server.js
const express = require("express");
const app = express();
const port = 3000;

// A simple route
app.get("/", (req, res) => {
  res.send("Hello, World from Express!");
});

// Start the server
app.listen(port, () => {
  console.log(`Server running at http://localhost:${port}`);
});
const app = express();
initializes a new Express application and is the standard first step in creating a web server with Node.js. The
appobject is the core of your app, providing methods for handling HTTP requests, defining routes, and adding middleware.
app.get("/", (req, res) => { // code to handle the request });
Part Meaning appThis is your Express application object, created when you call const app = express();. It represents your web server..get()This method defines a route handler for HTTP GET requests. GET is the method browsers use when you visit a page (like typing a URL). "/"This is the path (URL) for the route. "/"means the root of the website (e.g.,http://localhost:3000/).(req, res) => { ... }This is a callback function (called the route handler) that runs whenever a client makes a GET request to this path. reqShort for request — contains information from the client (like URL, query parameters, headers, etc.). resShort for response — used to send data or a message back to the client (like text, HTML, or JSON).
res.send("Hello, World from Express!");
res.send()is a method of the response object (res) in Express.
It tells the server to send a response back to the client — in this case, the text.
res.send("Hello, World from Express!");Send plain text
res.send("<h1>Hello, Express!</h1>");Send HTML
res.send({ message: "Hello", language: "English" });Send JSON
res.status(404).send("Page not found");Send status + message
Responds with HTTP status 404 and the message “Page not found”.
app.listen(port, () => { console.log(Server running
at http://localhost:${port}); });
Part Meaning app.listen()This starts the server and tells it to listen for incoming requests (like GET or POST) on a specific port. portThis is the port number your server will use — for example, 3000. It’s how your computer knows which program should handle which request.() => { ... }This is a callback function that runs after the server successfully starts. console.log(...)This simply prints a message in the terminal to tell you that your server is running and where to find it.
4. Check the
start script in package.json
If you don’t already have one, open package.json and
add:
"scripts": {
  "start": "node server.js"
}
5. Start the project
npm start✅ Console output:
Server running at http://localhost:3000Now if you open http://localhost:3000 in your browser,
you’ll see:
Hello, World from Express!6. (Optional) Development mode with automatic restart
Install nodemon, so the server automatically restarts
when files change:
npm install --save-dev nodemonThen change your start script:
"scripts": {
  "start": "nodemon server.js"
}
nodemon automatically restarts your Node.js server
whenever you modify a file.
Without it, you’d have to run npm start manually after each
change.
With nodemon, your server stays running and restarts as
soon as you save your code.
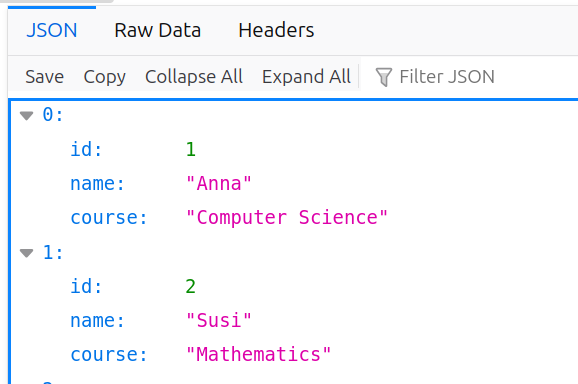
npm startGET /students
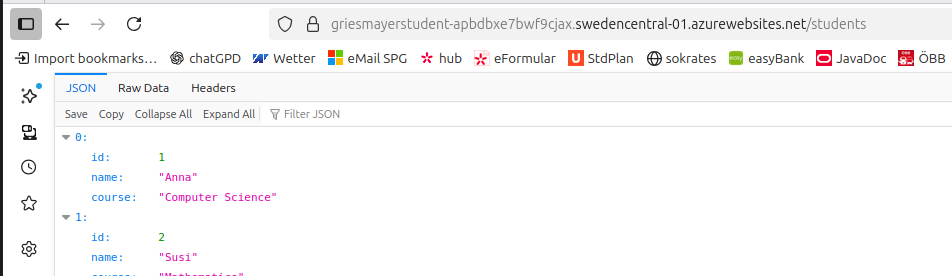
We’ll extend your project with a GET route that returns a list of 10 students as JSON — no database yet, just hardcoded.
If you open http://localhost:3000/students, you’ll get
something like:
[
  { "id": 1, "name": "Anna", "course": "Computer Science" },
  { "id": 2, "name": "Ben", "course": "Mathematics" },
  ...
]
1. Edit
server.js
const express = require("express");
const app = express();
const port = 3000;

// **NEW** Array of students
// hardcoded; no database
const students = [
  { id:  1, name: "Anna",    course: "Computer Science" },
  { id:  2, name: "Susi",    course: "Mathematics" },
  { id:  3, name: "Fritz",   course: "English" },
  { id:  4, name: "Andrea",  course: "Mathematics" },
  { id:  5, name: "Thomas",  course: "German" },
  { id:  6, name: "Verena",  course: "Mathematics" },
  { id:  7, name: "Marion",  course: "Mathematics" },
  { id:  8, name: "Karl",    course: "Computer Science" },
  { id:  9, name: "Hans",    course: "Mathematics" },
  { id: 10, name: "Barbara", course: "Computer Science" }
];

app.get("/", (req, res) => {
  res.send("Hello, World from Express!");
});

// **NEW** GET all Students as json
app.get("/students", (req, res) => {
  res.json(students);
});

app.listen(port, () => {
  console.log(`Server running at http://localhost:${port}`);
});
When a user visits /students, Express sends the
students array as a JSON response.
2. Test the route
In the browser:
👉 http://localhost:3000/students
Or with curl:
$ curl http://localhost:3000/students
[{"id":1,"name":"Anna","course":"Computer Science"},
{"id":2,"name":"Susi","course":"Mathematics"},
...
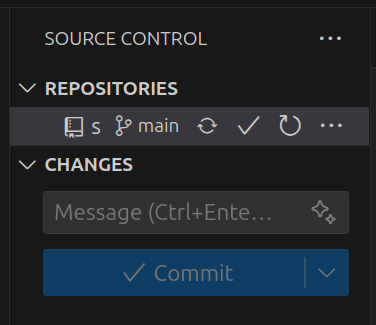
{"id":10,"name":"Barbara","course":"Computer Science"}]GIT
Do not forget to commit the work!
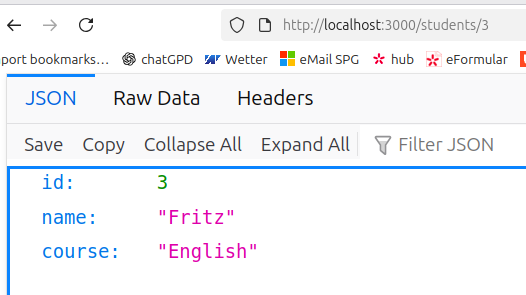
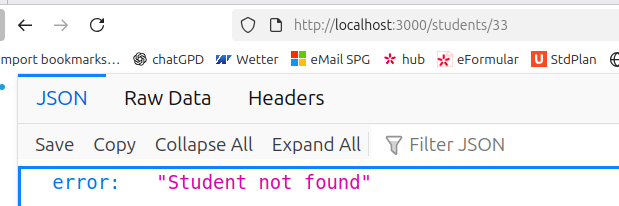
GET /students/:id
This route returns a single student by ID.
Example:
http://localhost:3000/students/3
Response:
{ "id": 3, "name": "Clara", "course": "Physics" }If the ID doesn’t exist:
{ "error": "Student not found" }const express = require("express");
const app = express();
const port = 3000;
const students = [
{ id: 1, name: "Anna", course: "Computer Science" },
{ id: 2, name: "Susi", course: "Mathematics" },
{ id: 3, name: "Fritz", course: "English" },
{ id: 4, name: "Andrea", course: "Mathematics" },
{ id: 5, name: "Thomas", course: "German" },
{ id: 6, name: "Verena", course: "Mathematics" },
{ id: 7, name: "Marion", course: "Mathematics" },
{ id: 8, name: "Karl", course: "Computer Science" },
{ id: 9, name: "Hans", course: "Mathematics" },
{ id: 10, name: "Barbara", course: "Computer Science" }
];
app.get("/", (req, res) => {
res.send("Hello, World from Express!");
});
app.get("/students", (req, res) => {
res.json(students);
});
// **NEW** GET one Student per ID
app.get("/students/:id", (req, res) => {
const id = parseInt(req.params.id);
const student = students.find(s => s.id === id);
if (!student) {
return res.status(404).json({ error: "Student not found" });
}
res.json(student);
});
app.listen(port, () => {
console.log(`Server running at http://localhost:${port}`);
});app.get("/students/:id", (req, res) => { // code here });
Part Meaning app.get()Defines a GET route — it handles HTTP GET requests (for retrieving data). "/students/:id"This is the route path. The part :idis a route parameter, meaning it’s a placeholder for a value that can change (like a student’s ID).(req, res) => { ... }This is the callback function (also called a route handler). It runs whenever a client makes a GET request that matches this path. reqThe request object, which contains information about the request (like URL, parameters, query strings, etc.). resThe response object, which you use to send a reply back to the client.
const id = parseInt(req.params.id);
Part Meaning req.params.idGets the idvalue from the URL. If the user goes tohttp://localhost:3000/students/5, thenreq.params.idis the string"5".parseInt(...)Converts a string to an integer (number). const id = ...Saves that converted value into a constant variable named id.
const student = students.find(s => s.id === id);
Part Meaning studentsThis is an array of student objects. Example: js const students = [ { id: 1, name: "Anna" }, { id: 2, name: "Ben" } ];.find()A JavaScript array method that searches through the array and returns the first element that matches a given condition. s => s.id === idThis is an arrow function — the condition used by .find(). For each elements(each student), it checks whethers.idis equal toid.const student = ...Saves the found student object in a variable called student.
if (!student) {
return res.status(404).json({ error: "Student not found" });
}
Part Meaning if (!student)This checks whether the variable studentis empty, undefined, or false. The!means “NOT”. So it reads as: “If there is no student…”returnImmediately stops running the rest of the function and sends the response back to the client. res.status(404)Sets the HTTP status code of the response to 404, which means “Not Found.” .json({ error: "Student not found" })Sends a JSON response to the client with an error message.
res.json(student);
Part Meaning resThe response object — it’s what Express gives you to send data back to the client (browser, Postman, etc.). .json()A method that sends a JSON (JavaScript Object Notation) response. studentThe data you want to send back — usually a JavaScript object.
$ curl http://localhost:3000/students/3
{"id":3,"name":"Fritz","course":"English"}
$ curl http://localhost:3000/students/33
{"error":"Student not found"}
GIT
Do not forget to commit the work!
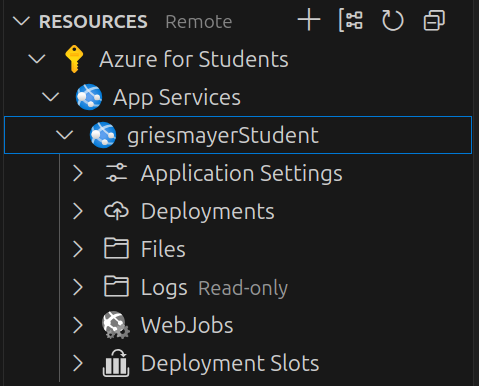
Azure
Login
Login at Azure:
https://azure.microsoft.com/de-de/get-started/azure-portal
You might need the Microsoft Authenticator.
Project
Development: For building, testing, and debugging your app locally. Production: For running your app live for real users.
Development Environment
This is where you (the developer) work.
Typical Features:
Runs on your local machine.
Uses tools like nodemon (auto restart).
Detailed error messages and debug logs are shown.
Code can be unoptimized for easier debugging.
You might use a test database (not real user data).
Production Environment
This is where your app runs for real users — e.g. on Azure, AWS, or another server.
Typical Features:
Optimized for performance and stability.
No detailed error messages (to protect information).
Uses real databases and real credentials.
Logs are minimal and secure.
Runs with
node, notnodemon.Might use tools like PM2 or Azure App Service to keep the app running 24/7.
Code
server.js:
// **NEW** use the Azure Port or 3000 if local
const port = process.env.PORT || 3000;package.json:
{
  "name": "student",
  ...
  // **NEW** Dev start nodemon; Prod start node
  "scripts": {
    "start": "node server.js",
    "dev": "nodemon server.js"
  },
  ...
  // **NEW** use a corect node version
  "engines": {
    "node": ">=18"
  }
}
"scripts": { "start": "node server.js", "dev": "nodemon server.js" },
Environment Command Description Development npm run devStarts the app with nodemon — automatically restarts when you save changes. Production npm startStarts normally with node, no automatic restart. Cloud platforms (like Azure, Heroku, Render, etc.) automatically run
npm start, so your production deploy stays clean.
"engines": { "node": ">=18" }
My app needs
Node.jsversion 18 or newer to work correctly.
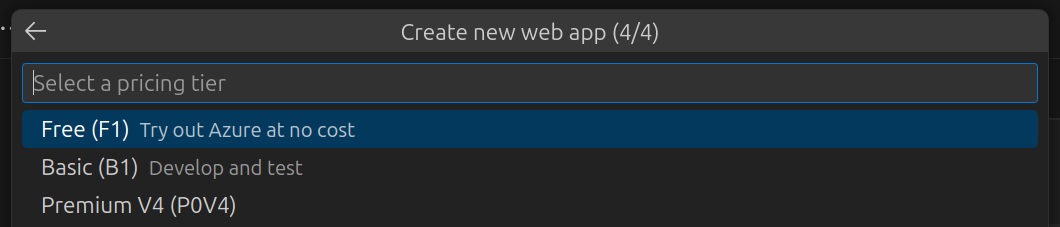
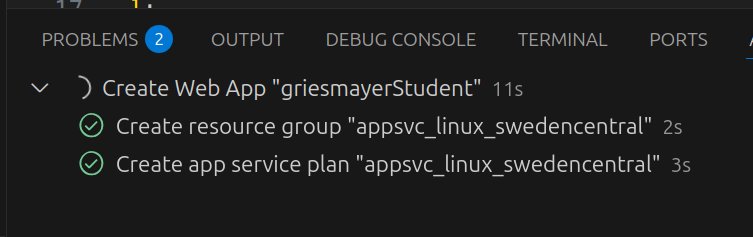
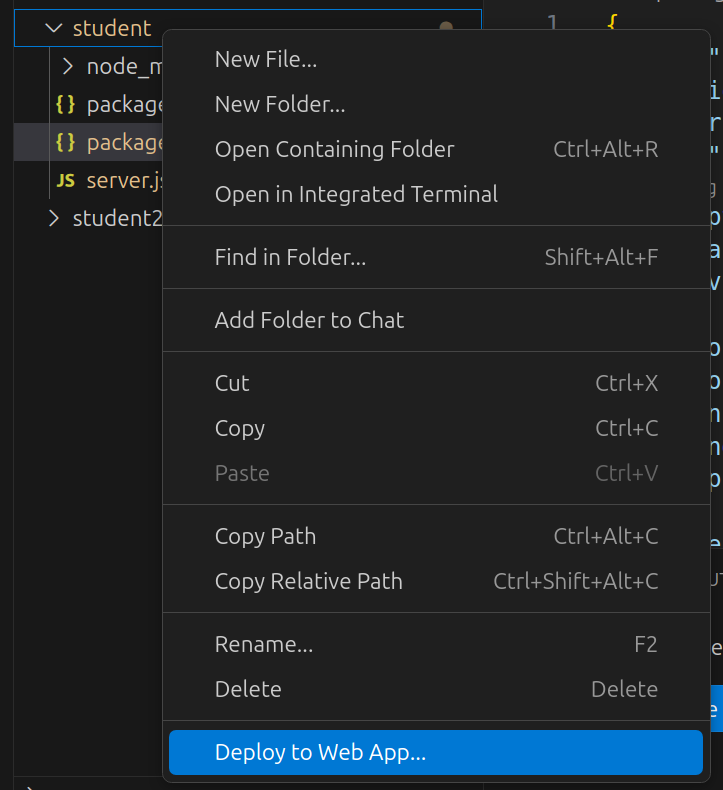
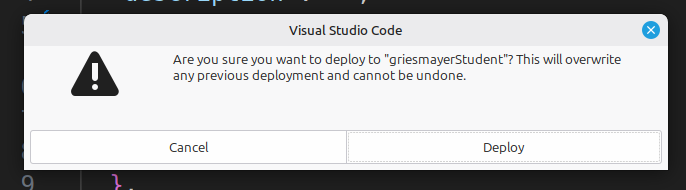
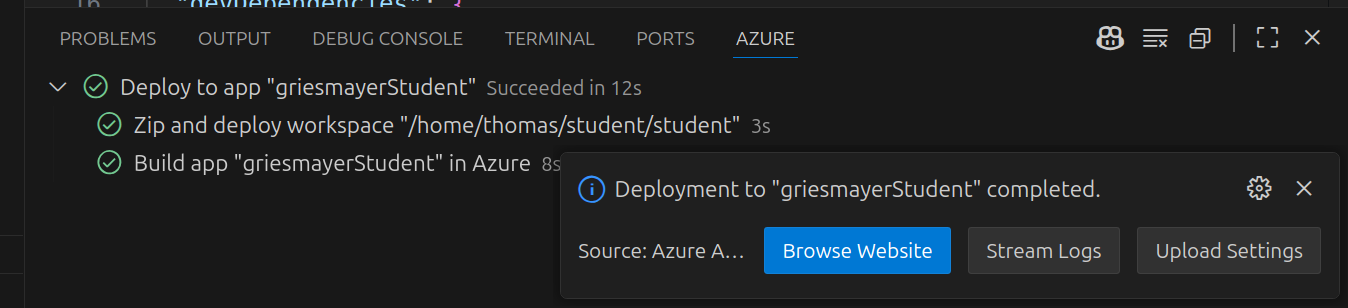
Deploy
List the allowed regions:
$ az policy assignment list --query "[].{Name:name,Scope:scope,Policy:policyDefinitionId,Params:parameters}" -o json
[
  {
    "Name": "sys.regionrestriction",
    "Params": {
      "listOfAllowedLocations": {
        "value": [
          "italynorth",
          "spaincentral",
          "switzerlandnorth",
          "swedencentral",
          "norwayeast"
        ]
      }
    },
    "Policy": "/providers/Microsoft.Authorization/policyDefinitions/b86dabb9-b578-4d7b-b842-3b45e95769a1",
    "Scope": "/subscriptions/1f6cbdf3-4bb1-4a35-9a70-bfe158842e6e"
  }
]